
15 October 2026
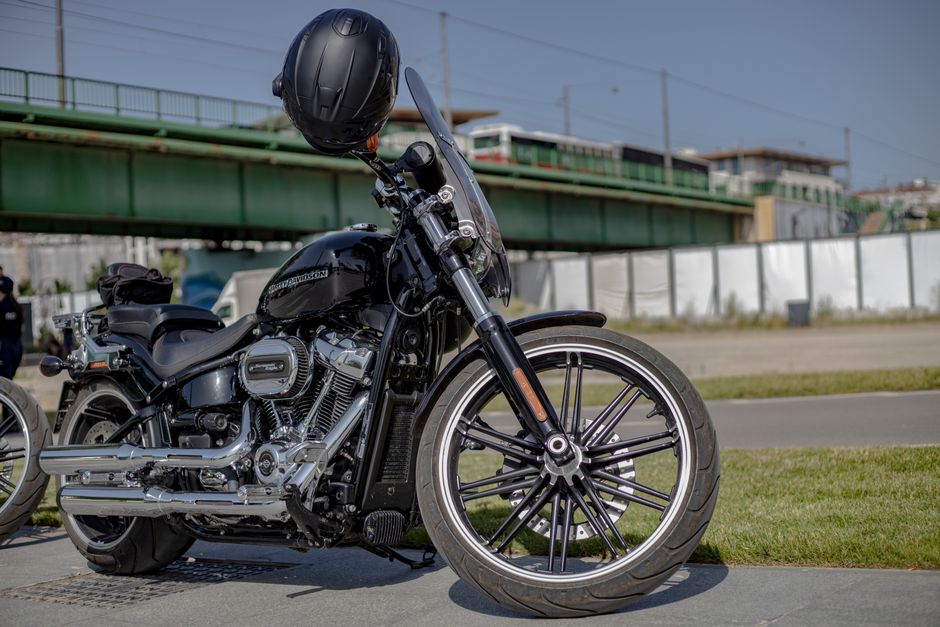
Photo by Boris Hamer on Pexels
How to Charge a Harley-Davidson Battery
Charging a Harley-Davidson battery correctly means connecting a compatible smart charger or maintainer to the battery terminals (positive first, negative second), setting the correct voltage for a 12V battery, and letting the charger complete its cycle without rushing it. Done right, a full charge from a deeply discharged state takes roughly 8 to 12 hours on a standard trickle charger, or as little as 1 to 2 hours on a high-output charger. This guide walks through every step, covers the most common mistakes, and explains how to keep your battery in good shape whether you ride daily or store the bike for winter.
---
What Type of Battery Does a Harley-Davidson Use?
Most modern Harley-Davidson motorcycles use one of two battery types:
- Absorbed Glass Mat (AGM): The standard fitment on the vast majority of current models, including Touring, Softail, and Sportster families. AGM batteries are sealed, spill-proof, and require a charger that supports AGM chemistry.
- Lithium Iron Phosphate (LiFePO4): Factory-fitted on some newer models and a popular aftermarket upgrade. Lithium batteries are lighter and hold a charge longer during storage, but they need a lithium-specific charger or a smart charger with a dedicated lithium mode.
Using the wrong charger chemistry setting can damage the battery, shorten its life, or in rare cases cause overheating. Always confirm which battery type is in your bike before you plug anything in. The battery label or your owner's manual will tell you.
Voltage: All current Harley-Davidson motorcycles use a 12-volt electrical system. A healthy, fully charged AGM battery reads approximately 12.6 to 12.8 volts at rest. A lithium battery in good condition typically reads 13.2 to 13.4 volts at rest.
---
Tools and Equipment You Need
Before you start, gather the following:
1. A smart battery charger or maintainer rated for 12V motorcycle batteries and compatible with AGM (or lithium, if applicable). Brands commonly used by Harley riders include Battery Tender, NOCO, Optimate, and Deltran. A 1.25-amp to 3-amp output is ideal for a motorcycle battery; anything above 10 amps risks overheating a standard bike battery.
2. Safety glasses (battery acid is corrosive, even in sealed AGM units).
3. Gloves (nitrile or rubber).
4. A clean cloth or rag.
5. A multimeter (optional but useful for checking voltage before and after charging).
---
Step-by-Step: Charging a Harley-Davidson Battery
Step 1: Safety First
Park the motorcycle in a well-ventilated area away from open flames or sparks. Even sealed AGM batteries can off-gas small amounts of hydrogen during charging. Do not charge in an enclosed garage with no airflow.
Turn the ignition off and remove the key.
Step 2: Locate the Battery
Battery location varies by model:
- Touring models (Road Glide, Street Glide, Road King): Under the left side cover or under the seat, depending on year.
- Softail models: Under the seat or behind the side cover.
- Sportster / Nightster: Typically under the seat.
- Pan America: Under the seat, accessible via a side panel.
Consult your owner's manual if you are unsure. Harley-Davidson also publishes model-specific service documentation.
Step 3: Inspect the Battery and Terminals
Before connecting anything, look at the battery terminals. Corrosion appears as a white or bluish powdery buildup. Light corrosion can be cleaned with a mixture of baking soda and water applied with an old toothbrush, then rinsed and dried thoroughly. Heavy corrosion or cracked battery casing means the battery likely needs replacement, not just a charge.
Step 4: Connect the Charger
Follow this order to avoid sparks near the battery:
1. Connect the red (positive) clamp to the positive terminal (marked + or red).
2. Connect the black (negative) clamp to the negative terminal (marked - or black).
If your bike has a factory-installed Battery Tender pigtail connector (common on many Harley models), you can plug the charger directly into that port without removing the seat or touching the terminals at all. This is the cleanest and safest method for regular maintenance charging.
Do not disconnect the battery from the bike unless you need to remove it for inspection or replacement. Charging in place is fine on most Harley models, and disconnecting the battery on newer bikes with complex electronics can trigger fault codes or reset security modules.
Step 5: Select the Correct Mode on Your Charger
- Choose AGM mode for sealed lead-acid or AGM batteries.
- Choose Lithium / LiFePO4 mode for lithium batteries.
- If your charger only has a single mode and no AGM or lithium setting, verify the charge voltage ceiling. AGM batteries should not be charged above 14.8V. Lithium batteries should not be charged above 14.6V (check the battery manufacturer's spec).
Step 6: Let the Charger Do Its Job
A smart charger will run through several stages automatically: bulk charge, absorption, and float (maintenance) mode. Do not interrupt the cycle. Typical charge times:
- Lightly discharged battery (12.0 to 12.4V): 2 to 4 hours on a 1.25-amp charger.
- Moderately discharged (11.5 to 12.0V): 6 to 10 hours.
- Deeply discharged (below 11.5V): 10 to 24 hours, and recovery is not guaranteed if the battery has sulfated.
Once the charger shows a green light or "maintenance" indicator, the battery is fully charged. A smart maintainer can be left connected indefinitely without overcharging.
Step 7: Disconnect in Reverse Order
1. Remove the black (negative) clamp first.
2. Remove the red (positive) clamp second.
This sequence minimises the risk of a spark near the battery.
Step 8: Verify the Charge
If you have a multimeter, check the resting voltage 30 minutes after disconnecting the charger. A healthy, fully charged AGM battery should read 12.6V or higher. If it reads below 12.4V after a full charge cycle, the battery is likely at end of life and should be replaced.
---
Common Charging Mistakes to Avoid
Using a car battery charger on high-amp setting. Car chargers set to 10 amps or more can push too much current into a motorcycle battery too quickly, causing overheating and permanent damage. Always use a charger designed for motorcycle batteries, or set a car charger to its lowest setting (2 amps or less) and monitor it closely.
Connecting negative before positive. Always positive first, negative second when connecting. Negative first, positive second when disconnecting. Reversing this risks a short circuit.
Ignoring a battery that will not hold a charge. If your battery drains within a day or two of a full charge, it is not a charging problem. It is a battery problem (or a parasitic drain from a faulty accessory or module). A battery that will not hold a charge needs to be load-tested or replaced.
Storing the bike without a maintainer connected. A Harley-Davidson left sitting for more than 30 days will lose enough charge to potentially sulfate the battery, especially in cold weather. A battery maintainer (not just a charger) left connected during storage prevents this.
---
Winter Storage and Battery Maintenance
If you store your Harley for winter, the battery is one of the most important things to manage. Here is the practical approach most experienced riders use:
1. Fully charge the battery before storage.
2. Connect a smart maintainer (Battery Tender Plus or NOCO Genius are widely used) and leave it plugged in throughout storage.
3. If you cannot leave a maintainer connected, remove the battery and store it in a cool (not freezing) location. Recharge it every 4 to 6 weeks.
4. Never store a battery directly on a concrete floor in cold conditions. The old advice about concrete draining batteries is mostly myth with modern sealed batteries, but cold concrete can accelerate self-discharge. A piece of wood or a rubber mat under the battery is a simple precaution.
AGM batteries self-discharge at roughly 1 to 3 percent per month in cool conditions. Lithium batteries self-discharge even more slowly, sometimes less than 1 percent per month, which is one reason riders upgrading from AGM to lithium often notice their bike starts more reliably after a long storage period.
---
When to Replace Instead of Charge
A battery that is more than 3 to 5 years old and showing any of these signs is probably past saving:
- Will not hold a charge for more than a day or two.
- Voltage drops below 10.5V under starter load (visible with a multimeter while cranking).
- Case is cracked, swollen, or leaking.
- Charger shows an error or "bad battery" code.
Harley-Davidson dealerships can perform a proper load test to confirm whether the battery is serviceable. Many auto parts stores offer free battery testing as well.
Replacement AGM batteries for most Harley models range from around $80 to $180 depending on the model and brand. OEM Harley-Davidson batteries are Yuasa-sourced units. Aftermarket options from Yuasa, Odyssey, and Shorai are widely used and trusted in the Harley community.
---
Renting a Harley-Davidson: Battery Considerations for Short-Term Riders
If you are considering a Harley-Davidson rental rather than owning, battery maintenance is not your concern. Rental operators handle all mechanical upkeep. Harley-Davidson motorcycle rentals are available through the official Harley-Davidson Authorized Rentals program, through independent operators, and through platforms that connect riders with private owners.
Searching for a Harley Davidson rental near me or rent Harley Davidson near me will surface both the official Harley dealer network and third-party providers. Dealers like Defiance Harley-Davidson (based in Defiance, Ohio) and regional shops such as Riding High Harley-Davidson offer rental fleets that include popular models from the Touring and Softail lineups.
For riders who want to try a specific model before buying, or who need a bike for a road trip in an unfamiliar city, Harley Davidson motorcycles rentals through an authorized dealer are generally the most straightforward option. The dealer maintains the bikes, carries the insurance, and provides a safety briefing. Rates typically run from $150 to $300 per day depending on the model and market, though prices vary and you should confirm directly with the rental provider.
If you are searching for Harley Davidson for rent near me, the Harley-Davidson website has a dealer locator that filters for rental availability. Independent rental platforms can also surface options in markets where dealer rentals are limited.
---
Quick Reference: Charging Summary
| Situation | Recommended Action |
|---|---|
| Bike sitting for 2 to 4 weeks | Connect smart maintainer overnight |
| Battery reads 12.0 to 12.4V | Charge 4 to 8 hours on 1.25-amp charger |
| Battery reads below 11.5V | Charge 10 to 24 hours; load-test after |
| Winter storage (1 to 5 months) | Keep maintainer connected throughout |
| Battery over 4 years old, slow to charge | Load-test; likely replacement needed |
| Lithium battery | Use lithium-specific charger mode only |
---
Keeping your battery properly charged is one of the simplest and most effective things you can do to keep a Harley starting reliably. A $30 smart maintainer can extend battery life by years and save you the frustration of a dead bike on a cold morning. Get the charger, learn the terminals, and make it part of your regular routine.
Frequently Asked Questions
Can I charge a Harley-Davidson battery without removing it from the bike?
Yes. On most Harley-Davidson models you can charge the battery in place by connecting a smart charger directly to the terminals or via the factory Battery Tender pigtail connector. Removing the battery is only necessary for inspection or replacement.
How long does it take to charge a Harley-Davidson battery?
On a 1.25-amp smart charger, a lightly discharged Harley battery takes 2 to 4 hours. A deeply discharged battery can take 10 to 24 hours. A high-output charger (10 amps or more) can charge faster but risks overheating a motorcycle battery and is not recommended.
What charger should I use for a Harley-Davidson AGM battery?
Use a smart charger or maintainer with an AGM mode and a maximum output of 1.25 to 3 amps for routine maintenance. Popular options include the Battery Tender Plus, NOCO Genius series, and Optimate 4. Avoid generic car chargers set to high-amp modes.
Can I use a car battery charger on a Harley-Davidson?
Only if the charger has a low-amp setting (2 amps or less) and you monitor it closely. Standard car chargers set to 10 amps or more can damage a motorcycle battery. A dedicated motorcycle smart charger is always the safer choice.
How do I know if my Harley-Davidson battery is dead or just discharged?
Check the resting voltage with a multimeter. A reading above 12.0V usually means the battery is discharged and can be recharged. A reading below 11.0V, or a battery that drops sharply under starter load, suggests the battery is sulfated or at end of life and should be load-tested or replaced.
How should I store a Harley-Davidson battery over winter?
Fully charge the battery, then connect a smart maintainer (such as a Battery Tender) for the duration of storage. If you cannot leave a maintainer connected, remove the battery, store it somewhere cool but above freezing, and recharge it every 4 to 6 weeks.
Where can I find a Harley-Davidson rental near me?
The Harley-Davidson website has a dealer locator that filters for rental availability through the authorized rentals program. Independent dealers such as Defiance Harley-Davidson and Riding High Harley-Davidson also offer rentals. Third-party platforms can surface additional options in markets with limited dealer coverage.
Does a Harley-Davidson use a lithium or AGM battery from the factory?
Most current Harley-Davidson models come from the factory with a sealed AGM (Absorbed Glass Mat) battery. Some newer models and many aftermarket upgrades use lithium iron phosphate (LiFePO4) batteries. Check your battery label or owner's manual to confirm which type your bike has before charging.